


Tuesday, August 24, 2010
Some New Lovelies


Sunday, August 22, 2010
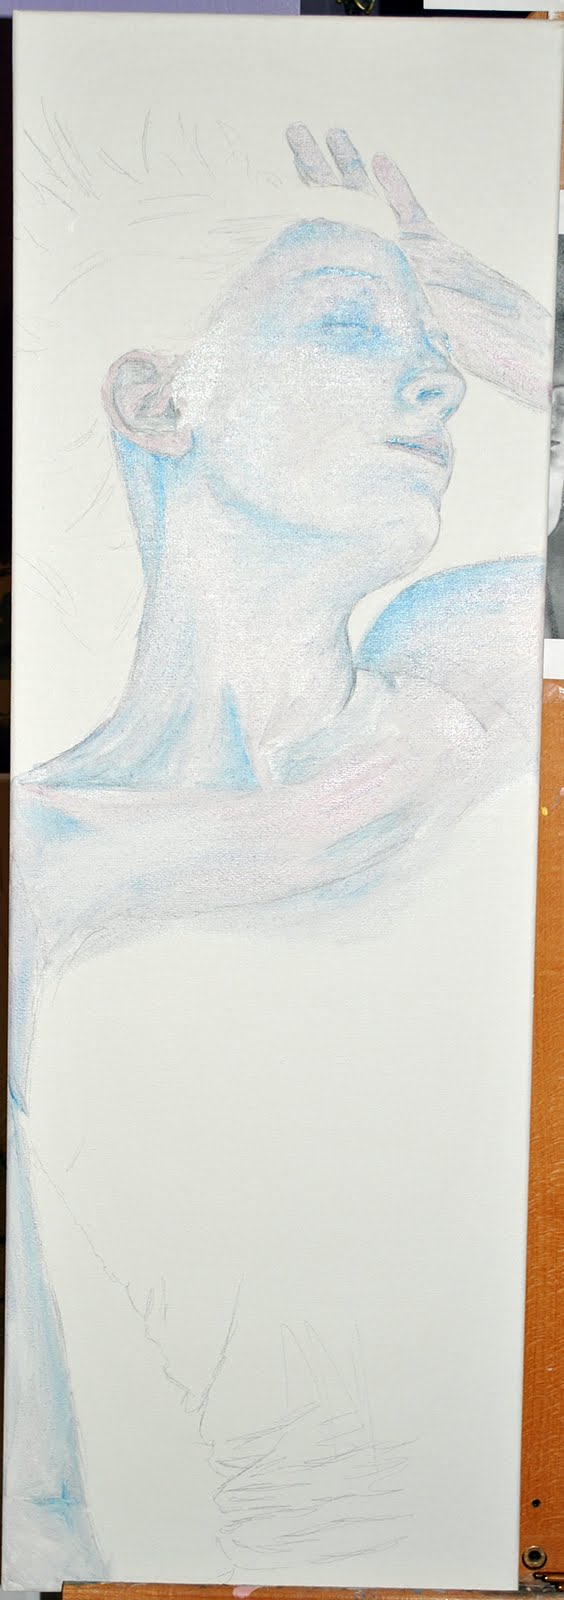
Color Pencil Work
So yesterday I decided that I wanted to start something in color pencils since it's been a while since I've gotten to do anything like that. This is just what I got done yesterday, so definitely not a completed piece and probably not as realistic as some of my paintings, but I think this was a nice change of pace.... And it went a lot quicker than I remember color pencil being last time I did it. I have no idea what the background will be... (haha, so unusual for me, right?) maybe inspiration will hit me as I go. It kinda reminds me of something sci fi -ish, which is different for me but I definitely like it :)
What do you think?

What do you think?

Thursday, August 12, 2010
Fall Come Soon

Since I couldn't wait any longer for Starbucks to bring back their Maple Scones, I made my own. And I think these are just as good! I've never made scones before, but these weren't that difficult to make and they are super yummy.... And they make me think of a crisp fall afternoon. I cannot wait for fall- it is my very favorite season. Here's the recipe I used for the scones. I hope you enjoy the pictures I took of mine (just getting used to my new camera).You should make some scones too, and enjoy the sweet taste of fall.
Ingredients:
For The Scones
- 1 cup quick cooking oats
- 1 1/2 cups flour
- 2 tablespoons sugar
- 1/2 teaspoon salt
- 1 tablespoon baking powder
- 2 tablespoons pure maple syrup
- 2 1/2 tablespoons cold butter (small pieces)
- 1 large egg
- 1/2 cup heavy cream
- 1 teaspoon maple extract
- 1/2cup coarsely chopped pecans
Maple Glaze
- 1 1/2 cups powdered sugar
- 1/2 teaspoon maple extract
- 2 teaspoons water
- 3 teaspoons pure maple syrup
Directions:
- Preheat oven to 425°F.
- Using a food processor or blender, finely grind oats.
- In a mixer, mix flour, oats, sugar, salt and baking powder.
- Add maple syrup and butter and mix well.
- In a small bowl, beat the egg with the cream and maple extract.
- Pour the egg mixture into the flour mixture and mix well.
- Add pecans and mix just to incorporate.
- Place dough on a floured surface. Knead and pat dough into a 8 to 10 inch circle and cut into 8 wedges.
- Spray a baking sheet with cooking spray. Place wedges on top and bake for 13 to 15 minutes, or until light brown.
- Remove scones from oven to wire rack. Let cool about 3 to 5 minutes.
- Mix glaze ingredients until smooth. Adjust the amount of water to get to the desired consistency. Spread lots of glaze over each scone and dry about 15 minutes before serving.
Enjoy!

Sunday, August 8, 2010
Thoughts on Taking Commissions
So lately I have been spending quite a bit of time considering how to best turn my art into something career-like. I love doing murals for people and am giving a lot of thought to doing this more often. But, what I am really excited about is another idea that I came across recently. I'm often asked if I do commissioned portraits, and typically I respond with "no, not right now," simply because I would not have enough time to do my own artwork-I need to be building my portfolio and trying to establish myself as an artist with my specific style of working. With that said, I've been thinking about ways I can still begin an art career while building my portfolio. Selling prints is great, but what I think I might want to start offering is Commissioned Fantasy Portraiture. Basically I would do commissioned portraits but in a fantasy style/theme. People could commission me to put them into whatever fantastical scene or idea they want or I could choose for them. So if you've ever dreamed of being a fairy or a mermaid or a warrior or whatever, I create you as that character.
I haven't worked all the kinks out yet, but I think I'm liking this idea. I could use these images in my portfolio since they fit with my body of work, and I could make some money doing what I love. And since some have been on to me about not selling my originals, this way some of my originals are out there.
So what do you think? Would you want to be in your very own Fantasy Portrait?
Saturday, August 7, 2010
New Handmade Earrings
So I have started learning how to make different pieces of jewelry, not really to sell but I thought it might be nice to include a little gift with purchases from my Etsy shop. I made my first 2 pairs of earrings tonight, and I think they turned out pretty well! Maybe I will eventually include these as little gifts, or I might work on more fabric flowers and make headbands, bangles, and such. But for now, I think I'm going to like wearing my new handmade creations. And I'm so proud of myself! :)


Painting a Portrait, Part 1
I'd love to show a painting in progress and the steps I take to complete a painting. So here we go....

 These are two new paintings that I have started and they are in the underpainting stage. Basically, I drew the images out with pencil and then mixed cerulean blue, alizaren crimson, and ultramarine blue with white (i used flake white this time) and thinned out the mixture with my solvent- I use Turpenoid Natural. I tend to use more of the blues for shadows and a more reddish purple for the highlights, but generally, the mixture gives me an indigo lavender underpainting. For me, this helps the skin look more realistic after I apply the upper layers of paint.

Subscribe to:
Posts (Atom)